
 Add to Preferred Sources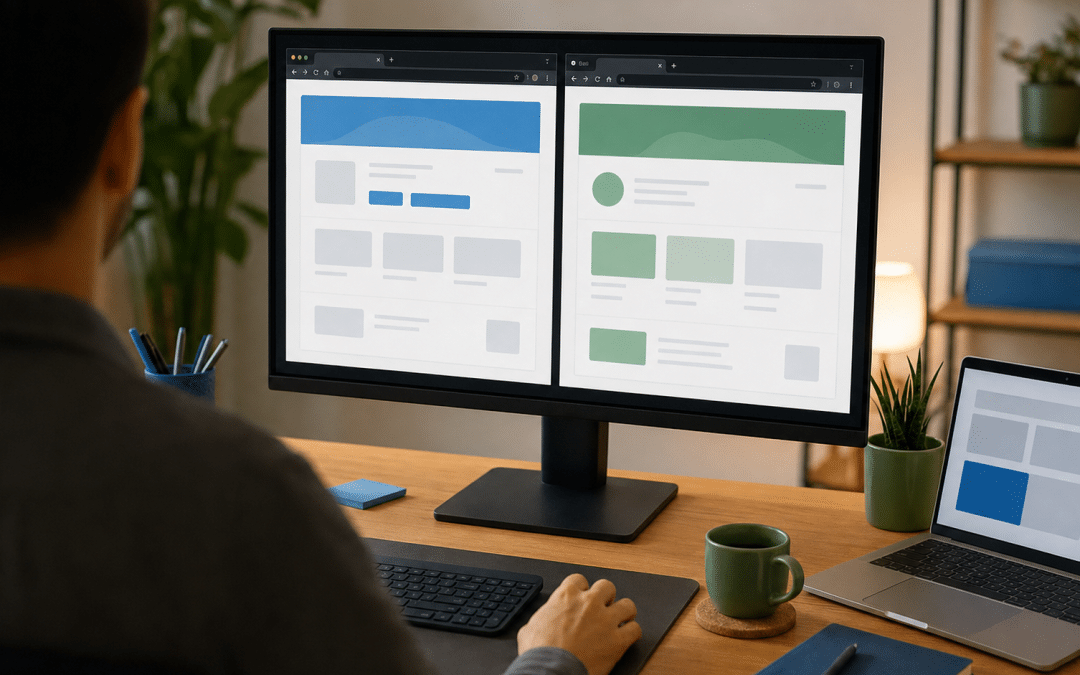
A staging environment is a private, hidden clone of your live website — the subject of this website staging environment guide — where you test every change before it reaches a real visitor. Plugin updates, theme overhauls, checkout flow edits and code additions all get validated on the staging copy first. For any South African business running WordPress, WooCommerce, or a managed CMS, staging is the line between a controlled update and a public-facing crash. Your Johannesburg web design or broader SA web build is only as reliable as the process used to update it.
South African operators face the same testing risks with a few added complications: managed hosting in SA often lacks the one-click staging features of international platforms, POPIA places obligations on how customer data is handled, and load-shedding can turn a poorly timed push-to-live into a half-migrated site. A staging setup addresses all three.
Quick Answer
A website staging environment guide covers running a private copy of your site for safe testing. A staging site mirrors your live site — same files, same database, same plugins — but is hidden from visitors and search engines, so changes are tested before they reach production. The three practical setup methods are host-built-in staging, a WordPress staging plugin, and a local tool like LocalWP or DDEV. On any site that takes orders or enquiries, one rule governs the push itself: push files, not the database — a full staging-to-live database push overwrites every order, customer record, enquiry and comment created since the staging copy was made.
In This Guide
What Is a Website Staging Environment?
What Can Go Wrong Without One?
Three Setup Methods: Which Fits Your Operation?
How to Block Search Engines from Your Pre-Production URL
Pre-Deployment Checklist Before You Go Live
Not Sure If Your Website Setup Is Built for Safe Updates?
Tell us about your current site and we will show you where your update workflow creates the most risk — and what a staging setup would look like for your stack.
Get a Free Website ReviewWhat Does a Website Staging Environment Guide Cover?
A staging environment is a fully functional replica of your production website, hosted on a private URL or subfolder, identical in files, database content, themes, and plugins to the live site — but isolated from public traffic and search engine crawlers. You make changes on staging, verify them, then deploy the verified changes to live. Nothing the visitor sees is touched until the change has passed testing.
The anatomy of a staging setup has three components:
| Component | What It Is | Why It Matters |
|---|---|---|
| Files clone | Copy of all WordPress/theme/plugin files | Ensures the change behaves in the real environment |
| Database clone | Copy of live database (posts, settings, users) | Tests against real content structure, not dummy data |
| Private URL | Subdomain or subfolder not publicly linked | Keeps crawlers and visitors away during development |
The three-environment model — development, staging, production — is the industry standard, and this website staging site guide treats that sequence as non-negotiable: code is written in development (often a local machine), validated in staging under production-like conditions, then shipped to production. Changes move in one direction only. Bypassing staging means bypassing the only checkpoint between a broken change and your live visitors.
What Can Go Wrong Without One?
The most common damage happens in three categories: site breakage, SEO harm, and data exposure — and each has a specific mechanism that staging prevents.
Site Breakage During Updates
Plugin updates are among the most common causes of live-site breakage on WordPress. A plugin update that conflicts with your theme or another plugin produces a white screen of death, broken layouts, or a non-functional checkout — visible to every visitor from the moment the update runs. On staging, the conflict surfaces in private and the fix happens before production is touched.
With staging: The plugin update runs on staging. Checkout breaks there. The developer reproduces the fault, identifies the conflict with the payment plugin, resolves it, and pushes the patched files to live once checkout passes. Visitors never see the broken state.
Without staging: The same update runs directly on production. Checkout breaks live and orders stop. Recovery is manual and open-ended — diagnose the conflict, decide whether to roll back, then restore a hosting backup — and every step of it happens while customers are hitting a broken checkout.
SEO Damage from Misconfigured robots.txt
This is the risk most website owners do not anticipate. A staging site needs a robots.txt file with Disallow: / to block search engines. When developers copy those staging files to production without replacing the robots.txt, the live site inherits the staging instruction — and Google stops crawling and indexing the entire site. Rankings and traffic can collapse within days as pages drop out of the index. This is one of the most common and most damaging SEO accidents in web development.
The correct approach is to serve a different robots.txt per environment: Disallow: / on staging, Allow: / on production — generated from an environment variable so the right rules always ship with the right environment.
Customer Data on Insecure Test Servers
Copying a live database to staging pulls customer names, email addresses and order histories out of WooCommerce or your CRM plugin and into an environment that typically has weaker security than production.
Under POPIA, personal information must be processed securely and only for the purpose for which it was collected. Staging should use anonymised or synthetic data, not a live customer database dump. Enforce this as part of staging environment best practices, before cloning any production database.
The three-line staging rule: Update on staging first. Never copy live databases with real customer data to staging without anonymising them. Always replace the staging robots.txt before pushing files to production.
Three Setup Methods: Which Fits Your SA Operation?
The right staging setup depends on your hosting environment, your team's technical skills, and how often you need to test changes. A correct website staging environment setup mirrors your production server as closely as possible — same PHP version, same plugin configuration, same database structure. Here is a decision table that maps operator type to method:
| Operator Type | Best Method | Cost | Push-to-Live | Best For |
|---|---|---|---|---|
| Solo site owner on managed host (Kinsta, WP Engine, Cloudways) | Host-built-in staging | Included on most plans | One-click via dashboard | Non-technical owners; frequent updates |
| SMB on local SA host (Afrihost, Hetzner, Xneelo) | WordPress staging plugin (WP Staging) | Free (clone only) or ~$105/year (push-to-live) | Manual (free) / one-click (premium) | Owners who cannot switch hosting; budget-conscious |
| Developer or agency managing client sites | Local environment (LocalWP or DDEV) | Free | Manual deployment or CI/CD | Full control; team environments; multi-site agencies |
Method 1: Your Hosting Provider's Built-In Option (Recommended for Most)
Managed WordPress hosts like Kinsta and WP Engine include staging as part of their service. Kinsta provides one free staging environment per site on all plans (from $35/month) and allows selective pushes — specific files or specific database tables, rather than overwriting everything. WP Engine includes a staging and a development environment on every plan, neither counting against your site limit, and its copy tool offers the same choice of file system only, database only, or both.
The workflow is: create staging → make changes → test → push to live. What you include in that push is the decision this website staging environment guide asks you to make deliberately — see the deployment section below before you push anything on a site that takes orders.
The downside for SA operators is cost: managed WordPress hosting is billed in USD, so even entry-level plans are a noticeable step up from local SA shared hosting. Whether that is justified depends on how often your site changes and what an hour of broken checkout costs you.
Kinsta standard vs. premium staging: Standard staging runs on 2 PHP threads and may sleep after 24 hours of inactivity — adequate for typical testing. Premium staging ($20/month per environment) mirrors your live plan's resources and includes CDN and edge caching — worth it for high-traffic stores where performance testing must match production.
Method 2: A Plugin-Based Clone (Most Common for SA SMBs)
WP Staging is the most-used plugin-based staging tool. Its free version clones your entire WordPress installation — files and database — to a subfolder on your existing hosting account (e.g., yourdomain.co.za/staging). The free version does not push changes back to production; you implement tested changes manually on the live site. The premium version ($105/year) adds push-to-live with selective push options, so files and database tables can be chosen independently.
The practical constraint: plugin-based staging runs inside your live hosting account, so resource-heavy operations on staging — large imports, full-site theme rebuilds — can slow the live site during testing. For most South African business sites running a standard WordPress stack with a typical plugin load, this is a minor issue. For high-traffic WooCommerce stores, consider host-provided isolation or a local environment instead.
Method 3: Local Development (Best for Developers and Agencies)
Local development tools create a complete WordPress environment on your own machine — entirely offline, zero impact on hosting resources. LocalWP is a free desktop application with a graphical interface, one-click site creation, and PHP 8.3 support. DDEV is a Docker-based tool favoured by agencies for its YAML configuration (which commits to Git for reproducible team environments) and multi-stack support across WordPress, Laravel, Drupal, and plain PHP.
The tradeoff: local environments do not perfectly replicate live server conditions. Differences in server configuration, PHP version, or server-side caching can produce behaviour on local that never appears on production — so use a real hosting-based staging environment for final testing before going live.
Redesigning Your Site or Planning a Major Update?
Send us your current setup and we will tell you which staging approach fits your hosting environment — and flag any update risks in your existing workflow.
Book a Free Website AssessmentHow to Block Search Engines from Your Pre-Production URL
Staging environment SEO protection requires a layered approach because no single technique is sufficient on its own. An unprotected staging site creates two distinct problems: Google indexes staging content, creating duplicate-content issues that dilute your live domain's authority; or — worse — a staging robots.txt gets deployed to production and wipes your live site from the index. Neither is recoverable quickly.
The Google page experience guidance notes that page signals are evaluated on a page-specific basis — meaning staging URLs that get indexed are treated as separate pages, not as variants of your live content. Use the table below to understand each protection layer and its limits:
| Protection Layer | What It Does | Why It Is Not Enough Alone |
|---|---|---|
robots.txt Disallow: / | Tells crawlers not to fetch staging URLs | A crawl hint, not a lock — Google can still index linked staging URLs |
| Meta robots / X-Robots-Tag noindex | Instructs search engines not to index the page | Requires crawling to read — less effective if crawl is already blocked |
| HTTP authentication (username + password) | Blocks all crawlers at the server level | Requires team access management; more setup |
| IP allowlisting | Restricts access to known IP addresses | Remote working and mobile connections change IPs |
The strongest protection is HTTP authentication on the entire staging domain: crawlers cannot log in, so they never see the content. Add two backup layers on top. First, Disallow: / in staging's robots.txt — a crawl control that tells bots not to fetch your staging URLs. Second, a meta robots content="noindex" tag in the page head — an HTML-level indexing signal, separate from robots.txt, that applies even if a URL is crawled. WordPress's "Discourage search engines from indexing this site" setting (Settings → Reading) delivers that signal with one checkbox.
The critical operational rule: staging files must never reach production with the staging robots.txt in place. Generate robots.txt from an environment variable, or verify it manually as part of every deployment checklist.
Staging protection in order of strength: (1) HTTP auth on the staging domain — crawlers cannot log in, so they see nothing. (2) A crawl block in staging's robots.txt: Disallow: /. (3) A meta robots indexing signal via WordPress's "Discourage search engines" setting. Use all three. And after every push to live, verify that production's own robots.txt uses Allow: /.
Pre-Deployment Checklist Before You Push to Live
A pre-deployment checklist is the final quality gate between staging and production — the tests that must pass before the push happens. Documenting what was tested and what was deferred keeps the process auditable and prevents "it worked on staging" surprises. This is the operational core of any website staging environment guide: a staging site is only as useful as the checklist governing what leaves it. Before the functional tests, though, settle what you are pushing.
Push Files, Not the Database, on a Site That Takes Orders or Enquiries
On WordPress, orders, customers, form submissions, comments and users live in the same database as your posts, pages and settings — so pushing a staging database to live replaces all of it with the copy taken when staging was created. WooCommerce orders sit in dedicated wc_orders, wc_order_addresses, wc_order_operational_data and wc_orders_meta tables (and in posts and postmeta before High-Performance Order Storage) — all inside that same database. Clone production to staging on Monday, work for three days, push the staging database back on Thursday, and Tuesday's and Wednesday's orders and enquiries are gone.
The tools that offer push-to-live say so directly. Kinsta's push documentation warns that any changes to the live site's database since the staging site was created will be lost — "comments, new content, purchases on ecommerce sites, sign-ups on membership sites, and forum posts" — and recommends making those changes manually on the live site instead of pushing the database.
WP Engine does not recommend pushing the entire database to production either, because the production database is completely overwritten and the live site can "lose important data like new orders or new users." WP STAGING Pro carries the same warning for shop owners: you do not want to overwrite orders and customer data on production.
All three let you choose what moves: Kinsta and WP Engine both support a files-only push and table-level database selection, and WP STAGING Pro lets you deselect file folders or individual tables before the push runs. On a transactional site, the working practice this website staging environment guide recommends is:
- Push files only — theme, plugins, and custom code — and leave the live database untouched
- Make settings and schema changes deliberately on production, by hand and one at a time, after the file push — not by importing a database wholesale
- Take a fresh production backup immediately before the push, not the previous night
- Where the host offers selective push, choose files-only explicitly rather than pushing everything
- Refresh staging from production afterwards, so the next test cycle starts from current live data
Push files, not the database: A full staging-to-live database push replaces the live database with the copy made when staging was created, and every order, customer record, enquiry and comment added in between is lost with it. Kinsta, WP Engine and WP STAGING Pro all support a files-only push for exactly this reason — use it, and make settings changes directly on production instead.
Functionality Tests
Run these on staging before every push, regardless of what changed — a plugin update that touched only one feature can break an unrelated one:
- Forms: Submit every contact form and signup widget; verify email notifications arrive
- Checkout (ecommerce): Complete a dummy purchase end-to-end; verify cart, coupon codes, payment gateway test mode, and order confirmation emails
- User roles: Log in as each user type (subscriber, editor, customer, admin) and verify permissions are correct
- Navigation: Click every main navigation link; confirm no 404 errors
- Search: Test internal site search if your site uses one
Visual and Device Tests
- Desktop (Chrome, Firefox, Edge): Verify layout, typography, images, and CTAs
- Mobile: Test on both iOS Safari and Android Chrome
- Tablet: Confirm intermediate breakpoints render correctly
- Images: Check no broken image references from the database URL swap between staging and production
SEO and Technical Checks
- Confirm staging
robots.txthas been replaced with the production version before push - Verify HTTPS is live and no mixed-content errors appear in the browser console
- Confirm canonical tags point to production URLs, not staging subdomains
- Check page titles and meta descriptions are correct for any pages with template changes
- Run a Core Web Vitals check on the live site after deployment (see the responsive web design best practices guide for tools)
Deployment Timing
Push to production during business hours on a weekday — never on a Friday afternoon, never late at night, and never during load-shedding if your team cannot monitor and respond. If something breaks, you need your host's support team and your developer available — which is why many technical teams schedule deployments Monday through Thursday during working hours. On a store, balance that against your own traffic pattern: pick a window genuinely quiet for customers rather than merely convenient for the team, and check that no checkouts are in progress before you start.
Rollback plan: Immediately before every push to production, create a fresh backup of the live site — one taken after the last order, not the night before. If the deployment introduces an error that was not caught in staging, restoring that backup returns you to a known-good state far faster than diagnosing the fault under live traffic, and it is the only version of the database that still contains the day's orders.
Why South African Businesses Choose Growth Pulse Media for Their Web Build and Maintenance
Staging is part of how the Growth Pulse Media web build process works. Dirk van Greuning built and scaled a large South African ecommerce business before founding the agency, so the operator-side perspective — what a broken live checkout costs, what a week of ranking drops does to pipeline — is built into how site builds and updates are managed.
Every project runs through a tested, documented deployment workflow, and all technical work is executed in-house. If your current setup lacks a staging environment or a documented update process, the Growth Pulse Media web design service builds both into the handover from day one — so you can update the site without gambling on whether the next plugin update breaks something live.
No obligation — we will get back to you within 24 hours.
Who This Is NOT For
Static brochure sites with no updates. If your site has not changed in two years and a developer touches it once a year, a staging environment adds process overhead the risk level does not justify. Staging pays off when change is frequent.
Operations that need a full CI/CD pipeline. If you run a SaaS product with multiple developers, daily deployments, and automated test suites, you need continuous integration and delivery — a WordPress staging plugin is not the right tool for that context.
Businesses whose sole digital presence is a social media page. Staging is a website-specific workflow. If you do not operate a website and have no plans to build one, the more relevant starting point is how to plan a business website before worrying about how to update one safely.
Want to Know If Your Site's Update Process Has Gaps?
Share your current stack and we will run through your deployment workflow and identify where changes reach production untested.
Get a Free Deployment AuditFrequently Asked Questions
What is a website staging environment and why do I need one?
A website staging environment is a private, hidden clone of your live website where you test changes before they go live. You need one because plugin updates, theme changes, and code modifications can break a live site without warning. Testing on staging first means any breakage happens in private, not in front of visitors or customers.
Does a staging site affect my SEO?
A staging site correctly protected with HTTP authentication, a crawl block in robots.txt, and an HTML-level meta indexing signal has no effect on your live SEO. The risk runs the other way: if staging files reach production with the staging robots.txt intact, your live site can be de-indexed and lose rankings within days. Verify your production robots.txt allows crawling immediately after any file deployment.
Can I use a staging environment with local South African hosting like Afrihost or Hetzner?
Yes. Local SA hosts typically do not include built-in staging, but the WP Staging plugin creates a clone inside your existing hosting account. The free version handles the clone; the premium version ($105/year) adds push-to-live. Alternatively, a local tool like LocalWP lets you work on your own computer and apply tested changes to the live site manually.
Should I copy my live customer database to staging?
No — doing so pulls real customer personal information into a less-secured environment. Under POPIA, personal information must be handled securely and used only for the purpose for which it was collected. Use anonymised or synthetic records for staging instead. Most WooCommerce and WordPress testing scenarios work fine with test orders and placeholder users.
Will pushing my staging site to live delete new orders and enquiries?
It will if you push the database. A staging-to-live database push replaces the live database with the staging copy, so orders, customers, form submissions and comments created since staging was made are lost — Kinsta's push documentation lists purchases, sign-ups and comments among what disappears, and WP Engine advises against pushing a full database to production. On a site that takes orders or enquiries, push files only and make settings changes directly on production.
How often should I update my staging environment from the live site?
Refresh staging from production before any significant test cycle, especially if your live site receives frequent content updates, new orders, or configuration changes. Staging that is far out of date may not reproduce bugs accurately, because the live database state is part of what the code runs against. For high-change sites, a weekly refresh is a reasonable working rule.
Build a Website That Stays Stable After Launch
Growth Pulse Media designs and builds WordPress and WooCommerce sites with documented staging and deployment workflows built in — not bolted on afterwards. All work is executed in-house. We work with a limited client load to ensure senior attention on every site. No obligation — we will get back to you within 24 hours.
Start the Conversation